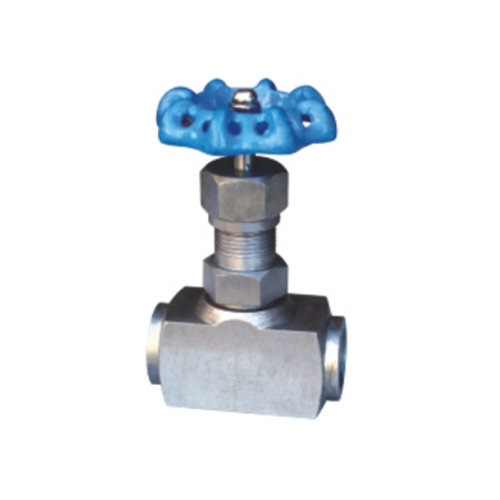
How to Repair a Leaking Ball Valve Effectively
Introduction
Ball valves are essential components in plumbing, industrial, and residential systems, providing reliable shut-off and flow control. However, like any mechanical device, they can develop leaks over time due to wear, improper installation, or damage. A leaking ball valve can lead to water waste, pressure loss, and even system failure if not addressed promptly.
This guide provides a comprehensive, step-by-step approach to repairing a leaking ball valve effectively. Whether the leak is due to a faulty seal, damaged ball, or loose connections, the following methods will help restore functionality and prevent further issues.
---
Understanding Ball Valve Components
Before attempting repairs, it's crucial to understand the key components of a ball valve:
1. Body – The outer casing that houses internal components.
2. Ball – A spherical disc with a hole (bore) that controls flow when rotated.
3. Seats – Rubber or PTFE (Teflon) rings that create a tight seal between the ball and body.
4. Stem – The shaft connecting the handle to the ball, allowing rotation.
5. O-rings & Packing – Seals that prevent leaks around the stem.
6. Handle/Lever – Used to open or close the valve.
Leaks typically occur at:
- The stem (due to worn O-rings or packing)
- The body connections (due to loose fittings or damaged threads)
- The seats (due to wear or debris)
---
Tools and Materials Needed
Before starting, gather the following tools and materials:
- Adjustable wrench or pipe wrench
- Screwdrivers (flathead and Phillips)
- Pliers
- Pipe tape (Teflon tape)
- Replacement parts (O-rings, seats, packing)
- Lubricant (silicone-based or PTFE grease)
- Rags or towels (for cleaning)
- Bucket (to catch water if needed)
- Safety gloves and goggles
---
Step-by-Step Repair Guide
1. Shut Off the Water Supply
Before working on the valve, turn off the water supply to prevent flooding. If the valve is part of a larger system, locate the main shut-off valve.
2. Drain Residual Pressure
Open a downstream faucet to release any remaining water pressure in the line. This prevents accidental spraying when disassembling the valve.
3. Identify the Leak Source
Determine where the leak is coming from:
- Stem leak – Water seeps around the handle when the valve is closed.
- Body/connection leak – Water drips from threaded joints.
- Seat leak – Water leaks even when the valve is fully closed.
4. Tighten Loose Connections
If the leak is at the threaded connections:
- Use a wrench to gently tighten the fittings. Avoid over-tightening, which can crack the valve.
- If tightening doesn’t work, disassemble the connection, apply fresh pipe tape, and reassemble.
5. Repairing a Stem Leak
If the leak is around the stem:
- Remove the handle (usually secured by a screw).
- Loosen the packing nut slightly to access the O-ring or packing material.
- Replace the O-ring or packing:
- Remove the old seal and clean the stem.
- Apply a small amount of lubricant to the new O-ring before installing.
- Tighten the packing nut just enough to stop the leak without restricting handle movement.
6. Fixing a Seat Leak
If water leaks when the valve is closed:
- Disassemble the valve:
- Remove the handle and unscrew the valve body (some valves have a union nut).
- Carefully extract the ball and inspect the seats.
- Clean or replace the seats:
- If seats are dirty, clean them with a soft cloth.
- If worn or cracked, replace them with new ones.
- Reassemble the valve, ensuring proper alignment of the ball and seats.
7. Replacing a Damaged Ball
If the ball itself is corroded or scratched:
- Remove the valve body and extract the ball.
- Replace it with a new one of the same size and material.
- Lubricate the new ball before reassembly.
8. Reassemble and Test
- Reconnect all components securely.
- Turn the water supply back on and check for leaks.
- Operate the valve several times to ensure smooth movement.
---
Preventive Maintenance Tips
To extend the lifespan of ball valves:
- Operate valves regularly to prevent sticking.
- Avoid excessive force when turning the handle.
- Use compatible lubricants on O-rings and stems.
- Inspect periodically for early signs of wear.
---
When to Replace Instead of Repair
If the valve is severely corroded, cracked, or has persistent leaks despite repairs, replacement may be the best option. High-pressure or critical systems should always use new valves to ensure reliability.
---
Conclusion
Repairing a leaking ball valve is a manageable task with the right tools and knowledge. By identifying the leak source and following systematic steps—whether tightening connections, replacing seals, or cleaning seats—you can restore the valve’s functionality efficiently. Regular maintenance further prevents future leaks, ensuring long-term performance.
If the damage is extensive, consider replacing the valve entirely to avoid system failures. With proper care, ball valves can provide years of trouble-free service.
यह वेबसाइट यह सुनिश्चित करने के लिए कुकीज़ का उपयोग करती है कि आपको हमारी वेबसाइट पर सर्वोत्तम अनुभव मिले।
टिप्पणी
(0)